Crumpety Flapjacks

Pancakes, crêpes, crumpets, flapjacks, drop scones?! Let’s get a few things straight here…
Crêpes are the pancakes we mean when we say “flat as a pancake”. They are beautifully wafer thin and roll up with fillings such as cinnamon and sugar, maybe some syrup, and possibly a squeeze of lemon juice for added zing. They are beyond easy to whip up (but just as easy to ruin, so be careful).
Crumpets are those fat discs of batter that people with (hole phobia) would be afraid of. They are best enjoyed by melting butter onto them, maybe with a squeeze of syrup.
 crumpets
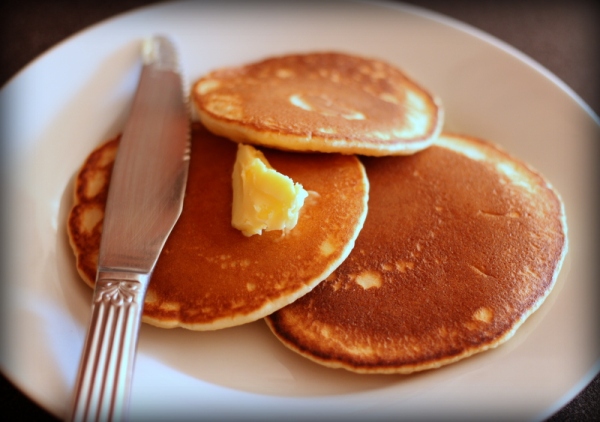
Flapjacks, are like the typical American pancake – but smaller. Americans stack the bigger ones high and have them with bacon and syrup, or you can have them stuffed with blueberries or chocolate chips. I accept people calling these pancakes as much as I accept when people still consider deep dish pizza (as opposed to thin base) to be “pizza”. Some people just prefer a thicker pancake, and we call them flapjacks. Then you get those random people from who knows where that talk about drop scones. I know this can be confusing, as these have no scones in them at all. We’ll pretend this makes sense, those individuals are gradually fading out of society, so we’ll just let them stay in their alternate reality until they are no longer around to confuse people.
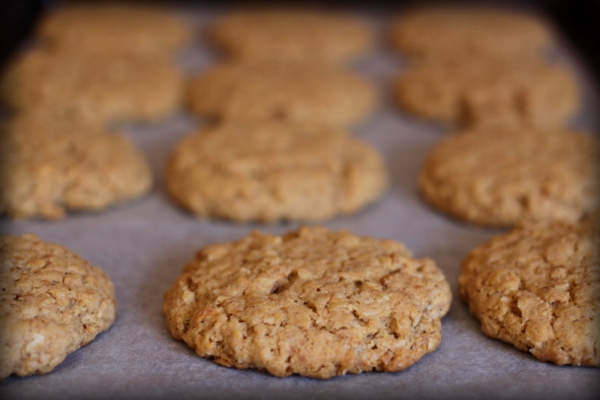
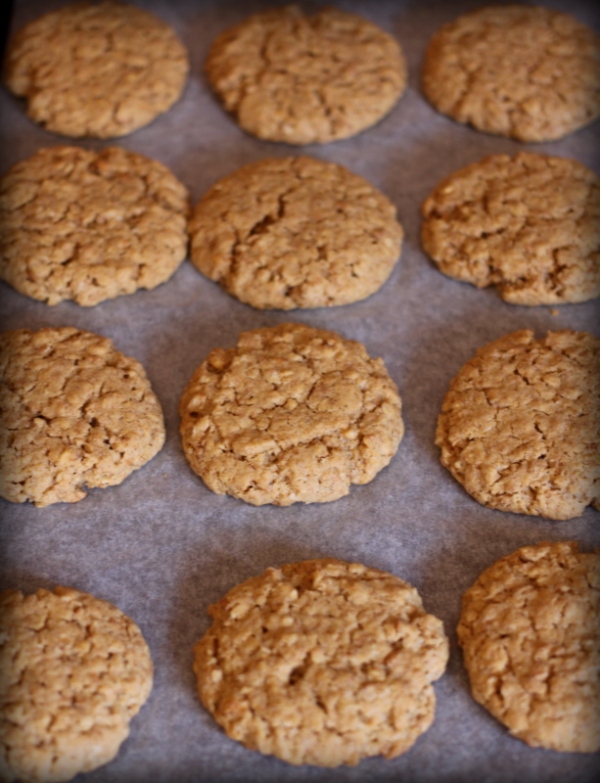
Then we have those who just need to acknowledge their wrongness. Those who think that chewy oat squares, what we call “Crunchies” in South Africa, are “flapjacks”. I’m sorry, but how now??? Please can someone explain how this biscuit is the same as a pancake in any which way? I am willing to accept defeat if there is some logical explanation behind this madness.
At the end of the day, however, they are all absolutely, completely, resolutely delicious, and the possibilities for making them even more exciting are endless. So whichever is your favourite, keep on loving the batter, and let me know which it is in the comments below.

Crumpets

Ingredients

  • ½ cup flour
  • 1 Tbsp sugar
  • Pinch of salt
  • 2ml baking powder
  • 1 egg
  • Approx. 125ml milk
  • 5ml melted butter

Method:

  1. Sift flour, salt and baking powder together
  2. Make a well in flour mixture with a wooden spoon, and add the egg
  3. Slowly work in enough milk to only wet the mixture. Tilt the bowl on its side and beat (slap) until there are no more lumps
  4. Melt the butter and add to the mixture
  5. Gradually add enough milk to form a pouring batter
  6. Heat pan to medium heat and spray with non-stick spray (or light coating of oil)
  7. Pour in spoonfuls at a time. When bubbles appear, turn over with a palette knife

Milktart

Dairy… It’s a love hate relationship for me. I love it, it hates me. In fact, I think it love-hates me, and can’t actually make up its mind. Either way, I am of the moderately informed opinion that dairy isn’t really ideal for human consumption at all, but chances are, unless you are hugely intolerant/allergic to the stuff, you won’t really care about a little bit of discomfort for the sake of the dairy!

Mini milk tart
Take, for example, the classic South African Milktart: 71% milk (excluding the crust, which can be omitted for the grain/gluten-free). I could honestly eat the whole thing. And yes, I would over-dramatically hate my life afterwards, and yes, I will possibly go into some form of hyperglycemic shock (from the 12 teaspoons of sugar), and yes, I would insist on running 10km every day for the next month, to try work it off and make myself feel less guilty for the gluttony, but this little local tart can be so worth it… (I say this as if I haven’t eaten a whole milk tart by myself before… This is a judgment free space people!)
I’ve been on a quest to find a recipe that doesn’t involve either condensed milk or custard powder. This one fails in that quest, but succeeds in every other tasty way. Of course, my search will continue, and many milktarts will be quality tested on the way, so it can’t be all that bad.
Melk tert

Milktart

Ingredients

  • 2 eggs
  • 10ml flour
  • 10ml custard powder
  • 20ml cornflour
  • 60ml sugar
  • Pinch of salt
  • 5ml vanilla essence
  • 565ml milk
  • 30g butter
  • 1 baked pastry case or biscuit crust
  • A little cinnamon

Method:

  1. Beat the eggs, then add the dry ingredients (flour, custard powder, cornflour, sugar and salt) and vanilla, and beat well
  2. Heat milk and butter until just boiling, then turn down to a slight simmer and gradually add the egg mixture, stirring constantly. Make sure not to let anything stick to the bottom of the pot.
  3. Cook, stirring continuously, until mixture thickens
  4. Pour mixture it a pie shell (biscuit crust or pre-baked), and sprinkle with cinnamon
  5. Leave to cool (or scald your tongue on the better version of warm homemade custard)

Courtney’s Gran’s Fudge

Nothing compares to a good fudge recipe – one that doesn’t crack and crumble and break your teeth, but also one that is so soft that it practically didn’t set. No, there has to be the perfect balance of stability and melt in your mouth softness. And this old family recipe gets that just right.
Fudge
This is one of those “handwritten-in-pencil-and-covered-in-coffee-stains-and-who-knows-what-else-from-the-kitchen” recipes. I got it from my bestie’s grandmother’s recipe book. It was the treat she would bring to school for those of us who are lucky to be her friend. She doesn’t make me fudge anymore, but I am still blessed beyond measure that I still get to count her as one of my closest. I promise not all my relationships are based on whether or not you feed me. It is a factor though…
Courtney's Gran's fudge

Gran’s Fudge

Ingredients

  • 1 large can of condensed milk
  • 400g sugar
  • 35ml golden syrup
  • 75ml water
  • 60g butter
  • 5ml vanilla essence

Method:

  1. Put sugar and water into a heavy saucepan. Stir over low heat until dissolved
  2. Add butter and syrup, stir until melted
  3. Pour in the condensed milk and stir until boiling
  4. Simmer slowly for 20-25 minutes, stirring continuously
  5. Remove from stove and stir in the vanilla essence
  6. Pour into a greased pan. Leave to cool. Cut into squares

Healthified Millionaire’s “Shortbread”

These are so good that if I didn’t have my healthy blog, I would definitely pop them straight onto this blog. They are best served cold, and can be enjoyed as a “whenever you feel like chocolate” snack, or as an energy boosting bar that satisfies your sweet tooth when you are attempting to be healthy.

IMG_0942

These are full of good fats (coconut oil, nuts, nut butter), which is both great, and deadly. The trick with healthy foods, is generally that moderation is still important. The high-protein, high-fat nature of these means they are very filling. Any more than one or two, and you’re definitely not enjoying them out of hunger, rather sheer enjoyment of the creamy, chocolatey, caramely goodness.

Check out the recipe here.

Frozen Coconut Ice – only 4 ingredients!

Do you want to build a snowman?
Or make a batch of icy treats?
I think some sugar here is overdue,
I’m talking to,
The banters who hate sweets!
Frozen Coconut Ice
Once upon a time we convinced ourselves that coconut was good for us, and that it fits perfectly into the low-carb:high-fat eating regime (which it kinda does, by the way). I have taken this useful information, and placed it in a far more practical application – the beauty and simplicity that is coconut ice. All your good fats, in one beautiful place.
Elsa Coconut Ice
And if you think there is too much sugar in this recipe (which there is, by the way), you can just Let It Go… Let it go, smile as you watch your tummy grow! Just kidding. Any treat can be enjoyed in moderation. In this case, moderation means one nibble per month, followed by at least a 21.1km half marathon.
Blue Coconut Ice
Totally worth it…
Frozen Coconut Ice
Ingredients
  • 1 can of condensed milk (400g)
  • 500g icing sugar
  • 400g desiccated coconut
  • Food colouring of choice – in the case of Frozen, you may want to use blue
Method
  1. Mix the condensed milk, coconut and icing sugar together until well-combined and consistent throughout
  2. Divide the mixture in half and colour the one half to the desired colour
  3. Press the white half of the mixture into a lined pan, such as a brownie pan, and compress down
  4. Repeat with the other half for the second layer, ensuring it is smooth and even
  5. Can be enjoyed straight away, cut into squares or other desired shape, and it lasts well (which is great because it can get very sweet)

Peanut Butter Oat Cookies

I know it may sound like a cliche, but peanut butter is my life. Especially these days. I almost feel guilty because we now have the wonders of cashew nut and almond butter, but I just don’t think you can beat a good ol’ table spoon of peanut butter (or three). Granted, peanuts aren’t really touted as being as cool as the rest of the super foods, and they are nut-posers which means we shouldn’t really trust them. However, these legumes are so versatile and so affordable, that you can pretend they are as healthy as their bourgeois counterparts.
Peanut butter oatmeal cookies
I feel bad, as well, when I pack my boyfriend’s lunch for him each day (no judging – if I didn’t do this, he would live on 2-minute noodles and tinned tuna, his idea of a balanced meal), because I feel like there is no variety in his lunch, and basically every snack/meal contains peanut butter. Peanut butter smoothie, peanut butter sandwich, peanut butter-chocolate protein oats… Add these cookies to the mix, and I’m pretty sure he would turn into peanut butter. As if he wasn’t tasty enough…
Oatmeal peanut butter cookies
These soft yet crunchy cookies unfortunately don’t do much for encouraging a healthy diet, even though they have peanut butter as their base (mostly because of the sugar). Peanut butter, I believe, is a pretty controversial snack/ingredient. On the one hand, they are a natural source of healthy fats and protein, which helps keep you full, and helps to keep your bones and muscles healthy. On the other hand, eating a whole jar of deliciousness doesn’t really count as moderation. Most unfortunate.
Oatmeal peanut butter cookies
If you can manage the moderation, or if you at least have enough people to share these with that your portion is limited by default, then you should definitely give these a bake. If not, then just enjoy them because they peanut butter in its cookie form – as if you needed another way to enjoy peanut butter.
Peanut Butter Oatmeal Cookies
Ingredients
  • 200g wholewheat flour
  • ½ tsp baking powder
  • ½ tsp baking soda
  • 125g butter
  • 200g brown sugar
  • ½ tsp cinnamon
  • 100g rolled oats
  • 175g chunky peanut butter
  • 2 eggs

Method

  1. Preheat oven to 180ºC and line your baking trays
  2. Cream the butter, sugar and cinnamon together until light and fluffy. Mix in the eggs and oats
  3. Sift the flour, baking powder and baking soda into the wet mixture and mix well
  4. Portion out the cookie dough onto your prepared pans, and flatten the dough balls
  5. Bake for 10-12 minutes until desired consistency. Slightly longer for a crispy cookie, slightly shorter for a more chewy cookie. Note that they will harden a bit once removed from the oven too
  6. Remove from the oven and allow to cool on a cooling rack

Quick Loaf

Summer is not merely upon us, rather, it is downright smothering us! This oppressive heat is… wonderful. I love it. Yay summer, yay shorts, and yay baking. Oh wait, not yay baking… It’s far too hot to have the oven on! That’s a real shame…

Quick loaf 1

I made this bread a while ago… Back when I was allowed to eat bread… While I am not meant to be eating bread at the moment, if I did actually make it again, I would definitely break my bread rule. I would just need to make sure I had someone to share it with, otherwise I would eat the whole thing! And that’s really not good for the whole “bikini body” thing everyone is on about…

Quick loaf 2

Ingredients

  • 400g white bread flour
  • 125g wholewheat flour
  • 2 tsp fine salt
  • 25g butter
  • 250ml warm water
  • 175g raw, grated potato
  • 2 tbsp malt vinegar
  • 5 tsp instant yeast
  • Oil for kneading

Method

  1. Mix the flours and the salt together and rub the butter through the flour mixture
  2. Stir together the warm water, potato, vinegar and yeast, and then add to the flour mixture, using it to bring the dough together
  3. Leave the dough to rest for 10 minutes, then remove from the bowl onto an oiled surface for kneading. Knead well
  4. Return to the bowl and leave to prove for 20 minutes
  5. Remove from the bowl, shape (ball or traditional free-form oblong loaf shape), and place on a floured tray. Cover with a tea towel and leave to prove for 20-30 minutes. Preheat the oven to 220°C while waiting
  6. Dust the loaf with flour, slash it down the middle, and place into the oven, on the middle rack, for 40-50 minutes. You may want to include a bit of steam in the oven by filling a small metal roasting tin with boiling water, and placing it on the lowest shelf (personally I have found that I end up with a soggy bottom when I do this, so I’m not really a fan – the loaf works with and without this step)

Cadbury Marvellous Creations Pop Up Store

Perhaps this is my way of pining over the chocolate that I haven’t had since I started taking my healthy kick seriously… I’ve been really good, feasting on chocolate-flavoured healthy treats, think protein shakes and nutty energy bites and granola bars with the merest suggestion of chocolate drizzled on… I’ve been really good and I am starting to see some really motivating results. It’s really me fighting the internal battle of whether or not chocolate tastes as good as strong feels…

Last month, before this commitment began, we went through to the Cadbury Marvellous Creations Pop Up store in Sandton City. Pop up stores are obviously all the craze at the moment… This one was by far the most value for money, though they are all done pretty effectively and there really is a full product experience all around.

CMCPU really gave you value though because all you had to do was buy the slab of chocolate, and then you get free treats afterwards, for TWO PEOPLE! So basically 3 treats for the price of one slab. I would definitely call that #winning.

Treat options were a block of shortbread, a mini cupcake (incl. icing) or a slab of chocolate. I chose the chocolate so that I could drizzle more melted chocolate on my chocolate and then top that with mini chocolates (crumbled cookies and astros). Chocolateception…

Chocolate Cake with Salted Caramel and Chocolate Ganache filling

I love having a family with good taste. It means I get to spoil them with experiments and I get to enjoy the benefits, both of actually putting together something delicious, and of enjoying it (I am still trying to figure out which one I enjoy more… thankfully it’s not important to figure out, otherwise I would be in a major quandary and dilemma and I would probably end up not doing either of them. I’m weird like that).

IMG_0791

I have a problem with reading, and I have lost my excuse since finishing University. While at school and while studying at University, I got a bit lazy to read. I absolutely love reading though, I always have, every since my Great Gran taught me how to read the children’s bible when I was 5! I got a Dictionary for my 6th birthday. Which I decided I would try and read when I was 11. Thankfully I didn’t get very far, that would have been a waste of time!

But that is my problem with reading: I feel that it is such a luxury past-time, that if I have something more “important” to be doing (such as assignments, studying, thesis, etc.), then how could I allow myself to indulge in reading? As a result I didn’t do my reading at Uni. Which isn’t to say that I got much of the other important stuff done in that time instead though, I would actually end up not doing either activity. So it really was a terrible excuse.

IMG_0819

Now, I can’t even use that excuse because I am no longer studying! I have free time which is actually free, and it is beautiful. You could say that the free time actually adds up to the endless holidays that students get. Or at least I can tell myself that so that I don’t feel so jealous about all their time to travel and explore…

The beautiful birthday girl

The beautiful birthday girl

I suppose what I do do instead of reading or studying now is bake. I am ok with that. Sometimes baking requires planning and organisation and grown up things like that, so for this cake for my cousin’s 18th, I had to make a practice version of the cake. You know, to make sure it worked out alright (nothing to do with sampling or ensuring that we had our own personal “leftovers”…

 practice cake
For the cake

Ingredients

  • 230g caster sugar
  • 4 eggs
  • 240g flour
  • 4 Tbsp cocoa powder
  • 1 Tbsp baking powder
  • ¼ tsp salt
  • 250ml milk
  • 125g butter
  • 1 Tbsp vanilla essence

Method

  1. Preheat oven to 180ºC. Prepare two round baking tins.
  2. Place eggs and sugar into a bowl and whisk on high until lighter in colour, thick and frothy
  3. Sift flour, cocoa powder, baking powder, salt together and fold into the egg mixture until all ingredients are just wet
  4. Melt down the butter into the milk in a pot on low heat. Add the vanilla essence once mixed together
  5. Add butter-milk mixture to the batter and stir until it reaches a smooth consistency. Mix carefully so as to not lose any of the air in the whipped eggs
  6. Divide batter equally between the two cake tins and place in the preheated oven. Leave to bake for 30 minutes
  7. Once done, remove from the oven and allow to cool before frosting.

Note: for this cake, I completely flattened off both tops using a bread knife. This was so the strawberries could sit safely

For the Salted Caramel

Ingredients

  • 1 Cup caster sugar
  • 100g butter (cubes)
  • 60ml cream

Method

  1. Place the sugar in a pot on a medium-high heat and allow it to melt. Do not stir. Shake the pot to mix the sugar and allow the top dry sugar to get to the heat under the molten sugar
  2. Once a golden colour is reached and all the sugar is dissolved, add the butter and stir until melted and mixed in
  3. Remove from heat and add the cream, stirring vigorously until all is incorporated
  4. Place in a bowl/container and allow to cool before using in this cake
For the Chocolate Ganache

Ingredients

  • 120g dark chocolate (I used Bournville)
  • 80ml cream (pouring or heavy cream)
  • 30g butter

Method 1:

  1. Melt the chocolate in the microwave in 30 second intervals, stirring regularly. Just before all the bits are melted, remove and keep stirring until the heat of the melted chocolate melts the remaining chocolate
  2. Add the butter and allow it to melt into the chocolate
  3. Mix in the cream until a smooth and consistent glossy chocolate mixture forms. Allow to cool slightly before use

Method 2: 

  1. Heat the cream on a stove top. Once simmering, remove from heat and pour over chocolate and butter. Ensure the chocolate has been chopped into small pieces so that it melts easier.


caramel ganache layer

For the Chocolate Buttercream frosting

Ingredients

  • 110g butter softened
  • 220g icing sugar
  • 20g cocoa powder
  • 40ml cream (or until desired texture is reached)

Method

  1. Cream the butter (electric whisk on low)
  2. Sift the icing sugar and cocoa powder together, and cream together with the butter
  3. Add the cream in small doses to help the mixture come together and continue to do so until desired consistency is reached
  4. Only frost cake once cake is coooled

Bliss Juicery

There are so many delicious bakeries, coffee shops, fast food restaurants around, that it’s quite tough these days to find somewhere convenient to get something healthy to snack on, something quick that’s not loaded with sugar or salt or a million and one preservatives. I have recently found a delicious and unique solution to my problem, and it’s only 5 minutes away from work!

Bliss entrance

Bliss Juicery is tucked away in the Colony Shopping Centre in Craighall, Johannesburg, and has been operating from there since the beginning of the year. They started out as a cleanse-only delivery service, which has now upgraded to supplying ready juices, practically on demand. They still offer juice cleanses, and they deliver your order within 15km of the shop.

Shelves

Juice cleanses from Bliss Juicery involve drinking 6 juices per day, for your choice of 1, 3 or 5 days. They also offer nut milks for some added protein, which seems like it would offer some welcome relief from straight juice for the whole day. Their Vanilla Almond Milk is absolutely incredible – and so fresh as well, it’s amazing.

bliss snacks

Bliss guides first-time juicers through the process, pre-warning them about the potential (side) effects. Basically a cleanse is like a detox, so when you go on a cleanse, you may experience similar symptoms as a standard detox, which involves headaches, caffeine withdrawal (is that really a bad thing?), and hunger. Also, “hunger”: we eat out of habit or boredom. I think that would be a big deal for me to overcome…

Health

Their juice recipes are designed based on a combination of flavour and health-benefits, in conjunction with a dietician, so not only does it taste like it’s healthy (especially their broccoli, spinach and courgette juice), but it actually is!

Bliss stocks a range of other healthy snacks as well, for those who feel like they are missing out on fibre or just want something delicious to nosh on. My favourite is their stock of Raw’s Truly vegan and gluten free snacks, especially their truffles. My mind is reeling just thinking about them, I can barely put into words how amazing they are… *zones off into daydreams of the melted “chocolate” and creamy “caramel” centres*

Healthy snacking

I am really looking forward to this health trend that many new restaurants are picking up on. It really helps when you are trying to maintain a healthy lifestyle. I hope to try a juice cleanse soon – hopefully flush my system of all the other delicious snacks I’m experimenting at the moment.

Those with hidden beginnings are often the ones who are focusing on what is most important.